


Replacing your motorcycle chain is a crucial aspect of maintenance that every DIY enthusiast should master. A well-maintained chain not only ensures optimal performance but also enhances the safety of your ride. An worn-out chain can lead to poor handling and unnecessary wear on other components, making timely replacement essential.
This article will guide you through the process of replacing your motorcycle chain step by step. With the right tools and a bit of patience, you can successfully complete this task on your own. Whether you are a seasoned rider or new to motorcycle maintenance, understanding the chain replacement process will empower you to take better care of your bike.
We will cover everything from assessing the need for a new chain to the specific tools required for this DIY project. Follow these steps carefully, and you’ll have your motorcycle running smoothly with a new chain in no time. Let’s get started!
Choosing the Right Chain for Your Motorcycle
Selecting the appropriate chain for your motorcycle is essential for optimal performance and safety. Various factors should be considered in this diy replacement process to ensure compatibility and efficiency.
First, check your motorcycle’s owner’s manual. Manufacturers typically specify the appropriate chain size, pitch, and link count. Accurate measurements are crucial; using a chain that doesn’t align with these specifications can lead to poor performance or even damage.
Next, consider the type of chain. Common options include O-ring, X-ring, and standard chains. O-ring and X-ring chains tend to have better durability and require less maintenance due to their sealing rings that protect the lubricant from dirt and debris, making them ideal for regular riders.
Another critical aspect is the chain’s tensile strength. Higher tensile strength indicates better resistance to wear and tear, making it crucial for motorcycles that undergo heavy use or those that produce high horsepower.
Don’t overlook the quality of the chain. It’s advisable to opt for reputable brands known for durability and reliability. Investing in a quality chain not only improves performance but can also save you from frequent replacements.
Finally, consider the chain’s weight. A lighter chain can lead to improved acceleration and handling, but make sure it still meets the strength requirements for your motorcycle type.
By carefully assessing these factors, you’ll be well-equipped to choose the right chain for your motorcycle, enhancing your riding experience and ensuring safety on the road.
Tools and Materials Needed for Chain Replacement
When embarking on a DIY motorcycle chain replacement, having the right tools and materials at your disposal is essential for a successful and safe process. Start by gathering the following items.
1. New Chain: Ensure you purchase the correct chain for your motorcycle model. Check the specifications in your owner’s manual or consult a knowledgeable dealer.
2. Chain Tool: A chain breaking tool is crucial for removing the old chain and connecting the new one. This tool allows you to push out pins from the links efficiently.
3. Rivet Tool: If your new chain requires riveted links, a rivet tool will help you securely fasten the pins and ensure proper tension and alignment.
4. Wrenches and Sockets: Depending on your motorcycle, you will need various sizes of wrenches and socket sets to remove the rear wheel and adjust the chain tension.
5. Replacing Master Link: If your new chain does not come with a master link, you may need to buy one separately according to the chain specifications.
6. Chain Lubricant: To maintain the longevity of your new chain, have a suitable chain lubricant on hand. This will ensure it operates smoothly and reduces wear.
7. Torque Wrench: This tool is necessary to apply the correct torque settings when reassembling the motorcycle, ensuring that all bolts and nuts are secured properly.
8. Cleaning Supplies: Have rags, degreasers, and brushes available to clean the chain and surrounding areas before installing the new chain. This will ensure optimal performance.
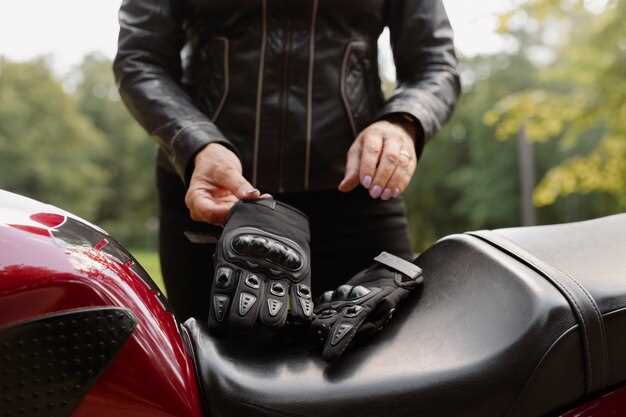
9. Safety Gear: Don’t forget to wear gloves and safety glasses to protect yourself while working on your motorcycle. Safety should always come first in any DIY project.
By preparing these tools and materials beforehand, you will make the chain replacement process smoother and more efficient, leading to a successful DIY motorcycle maintenance experience.
Step-by-Step Process for Removing and Installing the Chain
Replacing a motorcycle chain can seem daunting, but with the right tools and guidance, it can be a manageable DIY project. Follow these steps carefully for a successful removal and installation.
Tools and Materials Needed
- New motorcycle chain
- Chain tool or breaker
- Wrench set
- Screwdrivers
- Chain lubricant
- Torque wrench (if needed)
Removing the Old Chain
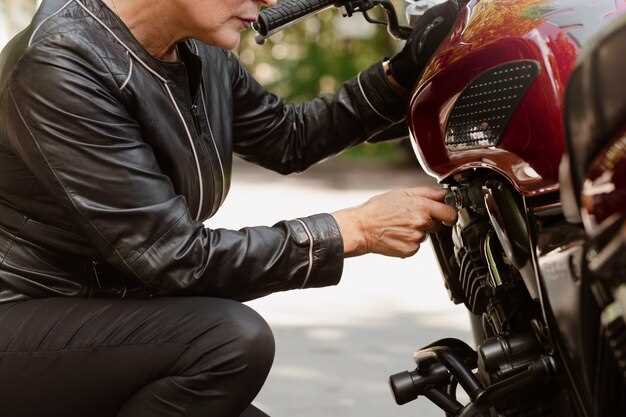
- Prepare the Motorcycle: Ensure the motorcycle is on a stable surface. Use a rear stand if available for better access.
- Locate the Chain: Inspect the chain for wear or damage. Identify the master link, which is used to remove the chain.
- Remove the Rear Wheel: Loosen the rear axle nut with a wrench and remove the wheel to facilitate chain access.
- Use the Chain Tool: If the chain has a master link, simply detach it. Otherwise, use the chain tool to break the chain at a convenient link.
- Remove the Chain: Once broken, carefully take the chain off the sprockets.
Installing the New Chain
- Prepare the New Chain: Unbox the new chain and ensure it matches the specifications of your motorcycle.
- Route the New Chain: Fit the chain over the front and rear sprockets, ensuring it is correctly positioned.
- Connect the Chain: If using a master link, slide it into place and ensure it’s securely fastened. If not, use the chain tool to connect the ends.
- Reinstall the Rear Wheel: Position the wheel back onto the motorcycle, tightening the axle nut as required.
- Check Slack: Adjust the chain slack according to the motorcycle’s specifications for optimal performance.
- Lubricate the Chain: Apply chain lubricant generously to ensure smooth operation.
Once all steps are completed, double-check your work. A well-installed chain is critical for the safety and performance of your motorcycle.


