


Understanding the wiring and electrical system of your bike is essential for maintaining optimal performance and ensuring safety on the road. Many cyclists overlook these components, assuming that as long as the bike is functioning, everything is in order. However, a well-maintained electrical system can enhance your riding experience significantly, providing better visibility, communication, and control.
The wiring of a bicycle encompasses various elements, including lights, signals, and electronic shifting systems. Each component plays a crucial role in how effectively your bike operates. Familiarizing yourself with these systems not only aids in troubleshooting potential issues but also enables you to make informed upgrades or repairs. A basic understanding of your bike’s electrical setup can save you time and money at the shop.
In this article, we will delve into the key aspects of bicycle electrical systems, focusing on wiring diagrams, common issues, and maintenance tips. By the end, you will have a clearer picture of how to care for your bike’s electrical components, ensuring a safe and enjoyable ride every time.
Identifying Common Bike Electrical Issues
Understanding the electrical system of your bike is crucial for effective maintenance and repair. Common electrical issues can range from simple to complex, and identifying them early can save you time and money.
One prevalent issue is a dead battery. This can occur due to extended inactivity or charging system failures. To diagnose, check the battery connections for corrosion and continuity. If the battery is not holding a charge, it may need replacement.
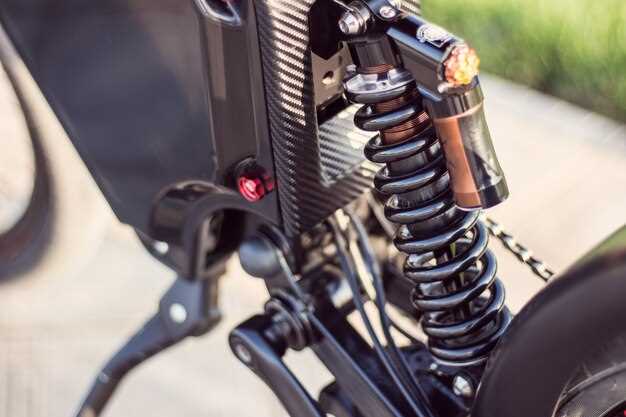
Another frequent problem is faulty wiring. Look for frayed or exposed wires, which can lead to shorts or disconnections. Inspect connectors for dirt or moisture, as they can interrupt the electrical flow. In many cases, repairing damaged wires involves soldering new segments or replacing connectors.
Malfunctioning lights are also a common complaint among cyclists. If your front or rear lights are flickering or not working at all, start by checking the bulb. If the bulb is functional, test the wiring leading to the light for breaks. Cleaning the contacts can also improve performance.
The horn or other electronic accessories might not operate as expected due to similar wiring issues. Ensure the switch, battery, and connections are all in good working order. Troubleshooting these components can reveal whether you need to replace a switch or repair a wire.
Lastly, a broken or malfunctioning controller can affect the overall performance of your electric bike. If your bike has an electronic display that’s malfunctioning or the assist levels are inconsistent, consult the manufacturer’s manual for guidance on troubleshooting or replacing the controller.
Regular maintenance checks can help prevent these issues, keeping your bike electrical system running smoothly.
Step-by-Step Guide to Wiring Repair on Your Bike
Proper maintenance of your bike’s electrical system is crucial for optimal performance. If you encounter issues such as flickering lights or dead taillights, a wiring repair may be necessary. Follow these steps to troubleshoot and fix your bike’s wiring.
First, gather your tools: wire cutters, a multimeter, insulated wire connectors, electrical tape, and a soldering iron. Having everything ready will streamline the repair process.
Begin by inspecting the wiring harness. Look for visible signs of damage, such as frays or cuts, which could compromise the electrical system. If you find damaged wires, identify the source of the problem and determine the extent of the repair needed.
Use a multimeter to test for continuity. Disconnect the battery before you conduct this test to prevent any electrical shocks. Check each wire from end to end. If the multimeter indicates no continuity, that section of wire will need to be repaired or replaced.
For wires that are frayed but not completely severed, cut out the damaged section using wire cutters. Strip the insulation from both ends of the wire using a wire stripper. Make sure to expose enough copper to make a solid connection.
If you’re connecting two wires, twist the exposed ends together and secure them with an insulated wire connector. Alternatively, you can solder the wires for a more permanent fix. Heat the soldering iron, then apply solder to the twisted wires until it flows and covers the connection. Allow it to cool completely before proceeding.
Once repaired, ensure all connections are properly insulated using electrical tape. This will protect the wires from moisture and prevent short circuits. Wrap the tape tightly around each connection, covering any exposed wire.
After completing the repairs, reconnect the battery. Test the electrical system by turning on the lights and checking other components. If everything is functioning correctly, carefully tuck the wiring back into its designated housing to prevent future damage.
Regular inspections and timely repairs will prolong the life of your bike’s electrical system, ensuring a smoother and safer ride.
Tools You Need for Electrical Maintenance and Repair
When it comes to maintaining and repairing the electrical system of your bike, having the right tools is essential. Proper tools can help you identify issues, perform repairs safely, and ensure long-lasting functionality.
First and foremost, you’ll need a multimeter. This tool is critical for measuring voltage, current, and resistance. With a multimeter, you can diagnose electrical problems by checking battery charge levels, testing connections, and ensuring components like lights and signals are functioning correctly.
Next, a set of wire strippers and crimpers is indispensable. These tools allow you to remove insulation from wires without damaging them and securely connect wires using connectors or terminals. Properly crimped connections are crucial for preventing electrical failures.
Additionally, a soldering iron can be useful for making permanent repairs to electrical connections. Soldering provides a reliable and durable bond, especially when dealing with wire splices or damaged connectors.
Don’t forget about electrical tape and heat shrink tubing. These materials are important for insulating exposed wires and protecting them from moisture and abrasion. Using these items will help you maintain a clean and safe electrical environment.
A tool kit containing various sizes of screwdrivers and pliers is also necessary. These tools will help you access different components and secure or adjust connections that may have become loose over time.
Finally, investing in a good-quality battery charger or maintainer is advisable. Regularly charging your battery will extend its lifespan and ensure that it’s always ready when you need it.
By equipping yourself with these essential tools, you’ll be well-prepared for any electrical maintenance and repair tasks that arise with your bike. Proper upkeep of the electrical system will enhance your riding experience and improve safety on the road.


